Here are a few of the "pins" that's I've done/put in place.
This one isn't a printable. It's a poster you can buy. But I took the picture and made my own "printable". I think this is great for toddlers learning to pray.
I put these in sheet protectors and will hang them on their walls (with my 3M hooks) next to their beds.
My little man is very eager to tell time. And if he's reading it off my phone, can do a pretty good job, sometimes. But I felt he needed to really know how to tell time. So I "pinned" this and headed out to Wal-Mart to get me a cheap clock, $3.97. Got back home and printed out my "minutes" (you'll have to ignore the lack of color coordination. I obviously was not paying attention). Grabbed my bag of 3M hooks and tabs (i used the tiny tabs to stick up the "minutes" and "bubbles". I used a medium hook/tab to hang the clock). I love these 3M hooks/tabs! I use them everywhere!
And here you go!
And here you go!
As I was putting all this together, my husband suggested I hang a white board so they could write down what time it was. Well...that's just genius. So I went out to my office, grabbed a sheet protector, slid a piece of printer paper in it, grabbed 2 medium size 3M hooks (the tiny hooks, I think, would have been fine, but I used all my tiny tabs on the clock part) and Voila!
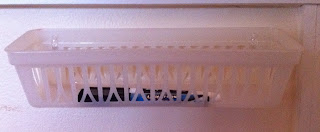
Then I realized I needed a place to hold the dry erase markers...well I just happened to have an extra pencil tray. Grabbed it, stuck 2 medium size 3M hooks on it and Viola, Viola!
Finished project!
We don't have a "school" room, so this is on a half wall in our den.
I'm hoping this one is very successful. I'm having a tough time with my two not obeying. When I saw this on Pinterest, I knew I had to give it a try. They love playing with keys, so I'm hoping these will be a huge success!
My son is working on this right now. I made up a flash card with it on there, but I like how with this print out, he can use his fingers and touch the numbers on the phone.
I did one of each. One with the Area Code and one with out.
I lucked up today, on my trip to Wally World. I was looking for something to make these out of. I believe these were Crystal Light cans, but I didn't have any of those, nor did I feel like buying 6 of them just to have the cans. So I went perusing the whole store. Every department looking for something. I even checked the leftover Valentines candy isle. I found some. They were filled with Starburst or Skittles, but they were $2 a piece. I needed 6 of them. So I kept looking. I searched the whole store, found nothing. So on my way to the check out, I looked down the candy isle one more time, just hoping. And a couple of boxes down I saw a box of double bubble cans...$1 each!!! Woo-hoo! I snatched up 6 of them. And the best part...they are actual piggy banks!
Here's what I used.
3 - 4 3/4" x 8 1/8"
1 - sheet of coordinating paper
hot glue & gun
labels
scissors (i used a paper trimmer to cut the lengths of my papers)
I'm opting not to "Mod Podge" mine or use ribbon. You can if you wish!
3 - 4 3/4" x 8 1/8"
1 - sheet of coordinating paper
hot glue & gun
labels
scissors (i used a paper trimmer to cut the lengths of my papers)
I'm opting not to "Mod Podge" mine or use ribbon. You can if you wish!
*there is a link to this pin, but I clicked on it and searched and searched and couldn't find the actual post*
But what a great idea!
My children are good, but I feel like I don't give them enough praise when they are being extra good. So I decided I'd do this.
I just printed it out on a white piece of paper and framed it. I will use a dry-erase maker to make marks on top of the glass of the picture frame! Genius!!
I still have lots more that' I've "pinned" and want to implement...so stay tuned!
Love, Play, Joy
~Amy


.JPG)
.JPG)


.JPG)
.JPG)

No comments:
Post a Comment